
Settings walkthrough
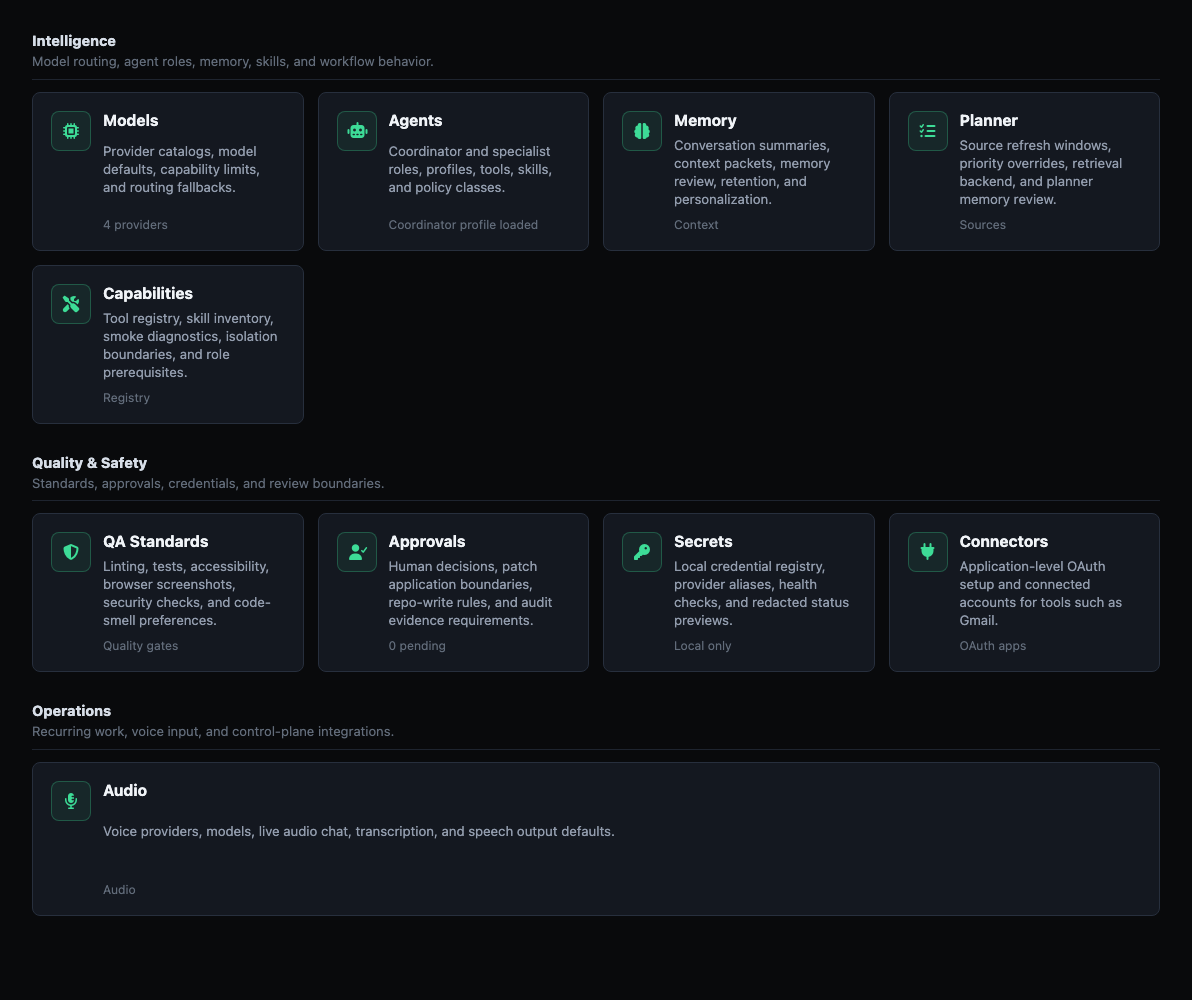
Use Settings when you want to change how Aegis routes work, stores context, reviews risk, connects accounts, or runs operator-facing tools. Open the dashboard, select the Settings gear, then choose a card.
Settings are grouped into three areas:
- Intelligence: Models, Agents, Memory, Planner, and Capabilities.
- Quality & Safety: QA Standards, Approvals, Secrets, and Connectors.
- Operations: Audio.
Models
Models control which providers and model names appear in coordinator, agent, and workflow selectors.
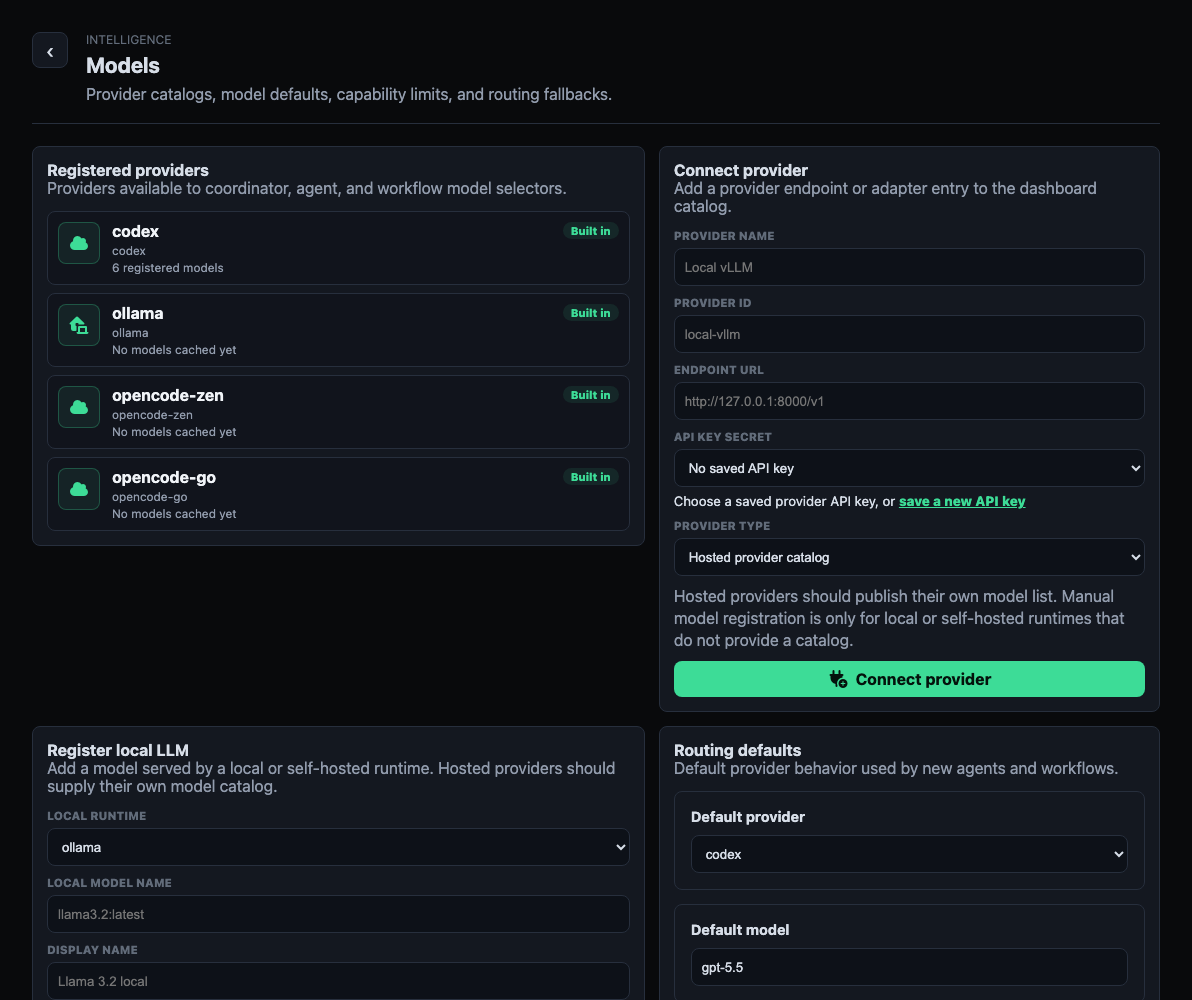
Use this section to:
- Review registered providers.
- Add a provider endpoint or adapter to the dashboard catalog.
- Choose a saved provider API key from Secrets when the provider needs one.
- Register local or self-hosted models that do not publish a model catalog.
- Set routing defaults for new agents and workflows.
- Decide whether model routing should require capability matches.
- Decide whether capable local models should be preferred.
Built-in providers include codex, ollama, opencode-zen, and opencode-go. Manual model registration is intended for local or self-hosted runtimes such as Ollama, LM Studio, vLLM, llama.cpp, or LocalAI.
Related guide: Add model providers.
Agents
Agents define coordinator and specialist profiles. A profile controls how an agent appears in workflows, which provider/model it prefers, which tools or skills it can use, and what approval policy applies by default.
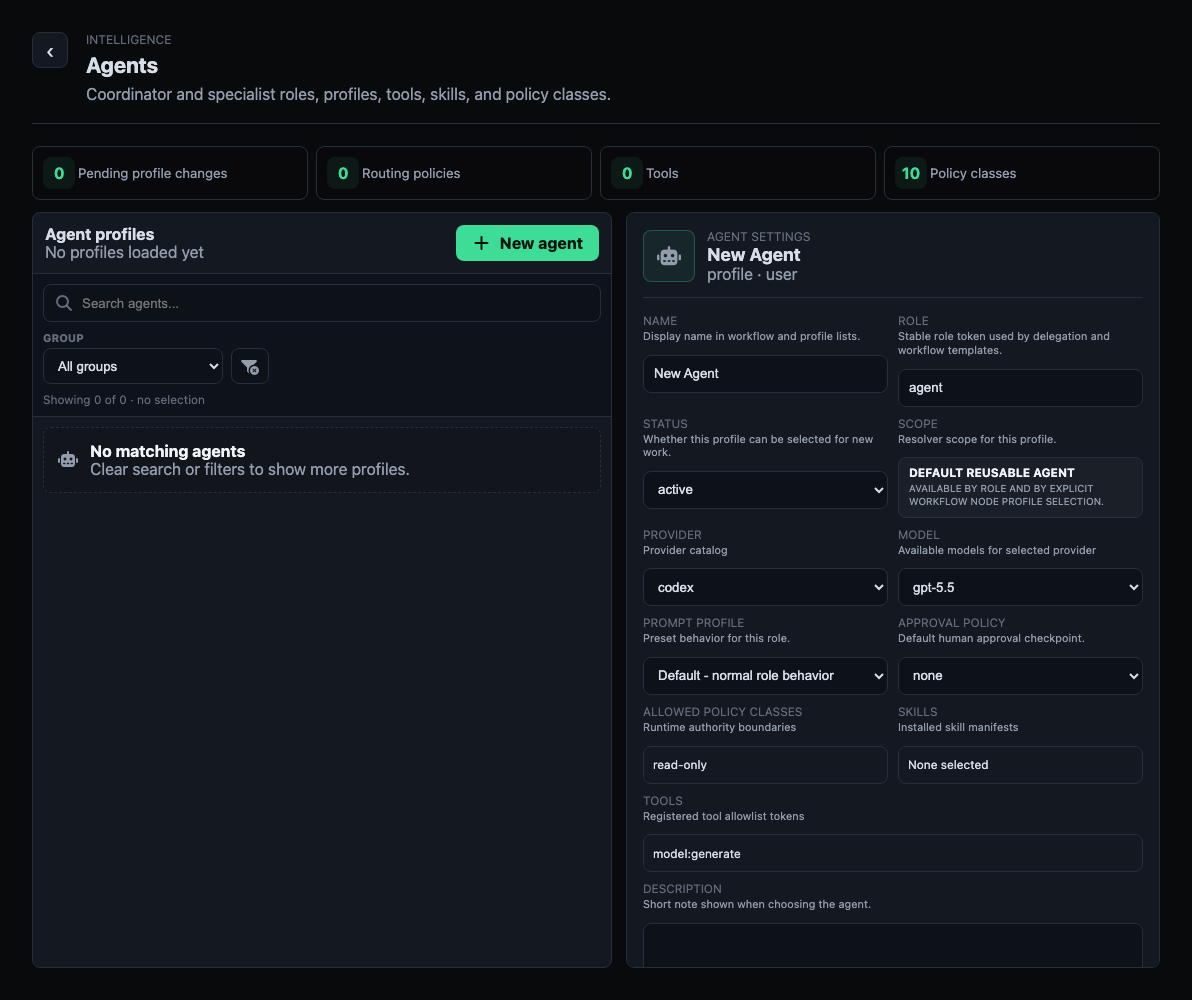
Use this section to:
- Search and filter existing profiles.
- Select a built-in, workflow-template, or user-created profile.
- Create a new agent profile.
- Set the profile name, role token, status, and scope.
- Choose provider and model defaults.
- Choose a prompt profile.
- Attach tools and skills.
- Set the default approval policy.
- Review skill/tool mismatch warnings before saving.
- Restore a workflow-template profile back to its default when needed.
Keep profiles narrow. An agent that only has the tools, skills, and approval class it needs is easier to audit than a broad general-purpose profile.
Related guide: Create and use skills.
Memory
Memory controls what durable context Aegis can save, review, recall, and use in future sessions. The runtime stores durable memory records in SQLite today; optional vector backends can support larger retrieval surfaces.
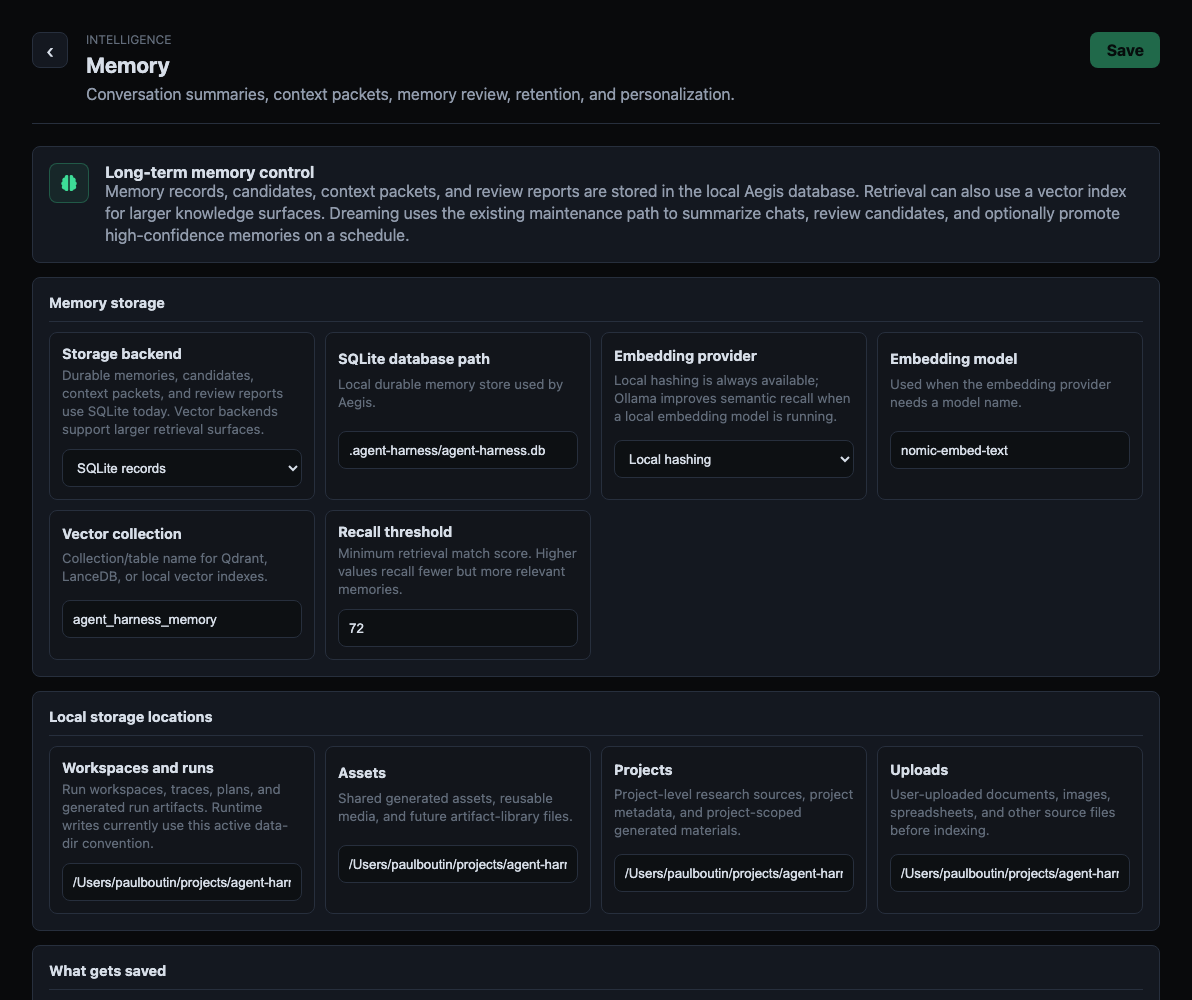
Use this section to:
- Choose the memory storage backend.
- Configure embedding provider, embedding model, vector collection, and recall threshold.
- Review local storage locations for runs, assets, projects, and uploads.
- Decide what gets saved: conversation summaries, decisions, user preferences, project facts, codebase conventions, follow-ups, and failure patterns.
- Keep secret exclusion enabled.
- Edit memory save rules and exclusion rules.
- Choose the personalization mode.
- Set retention window and maximum recalled memories.
- Preview active memory records and candidates.
- Run memory review or maintenance when stale, duplicate, or conflicting records need cleanup.
Memory should stay factual and reviewable. Prefer short records with source context over broad summaries that are hard to audit.
Related docs: Runtime Flow.
Planner
Planner controls how Aegis ingests connected sources, ranks work, detects conflicts, and searches planner knowledge.
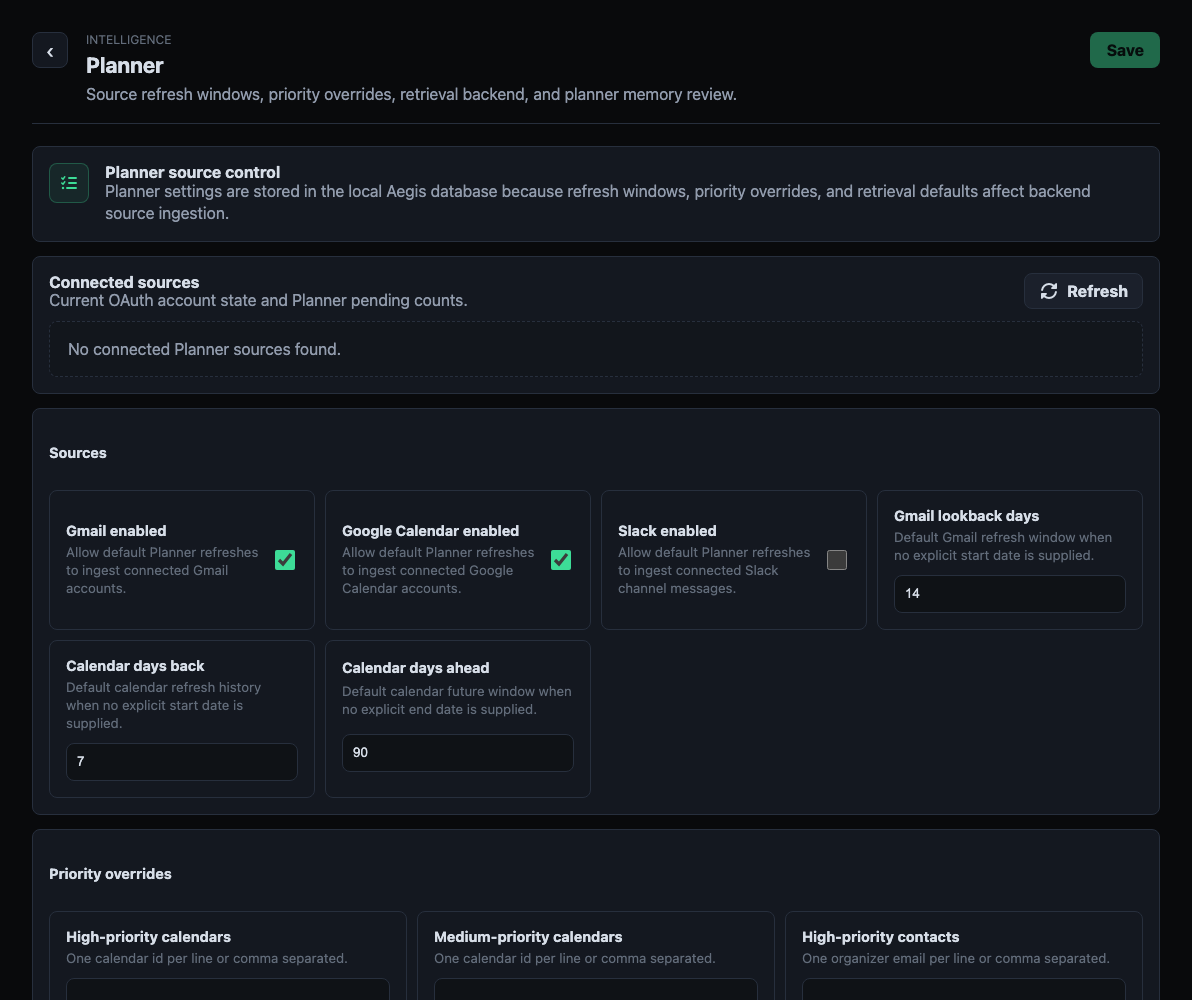
Use this section to:
- Review connected source status for Gmail, Google Calendar, and Slack.
- Enable or disable source refreshes.
- Set Gmail and calendar lookback/lookahead windows.
- Add high-priority calendars, medium-priority calendars, and high-priority contacts.
- Choose a conflict resolution policy.
- Choose whether assessment requires a model or can use heuristic fallback.
- Select the retrieval backend: local, Elasticsearch, or hybrid.
- Force a Planner refresh when source settings or retrieval settings change.
Planner source access depends on configured connector accounts. Set those up first when source status shows missing or disconnected accounts.
Related guide: Set up accounts and connectors.
Capabilities
Capabilities show the tools, skills, and inventory records available to agents and workflows. This is where you inspect what an agent can call and where you build or import reusable skills.
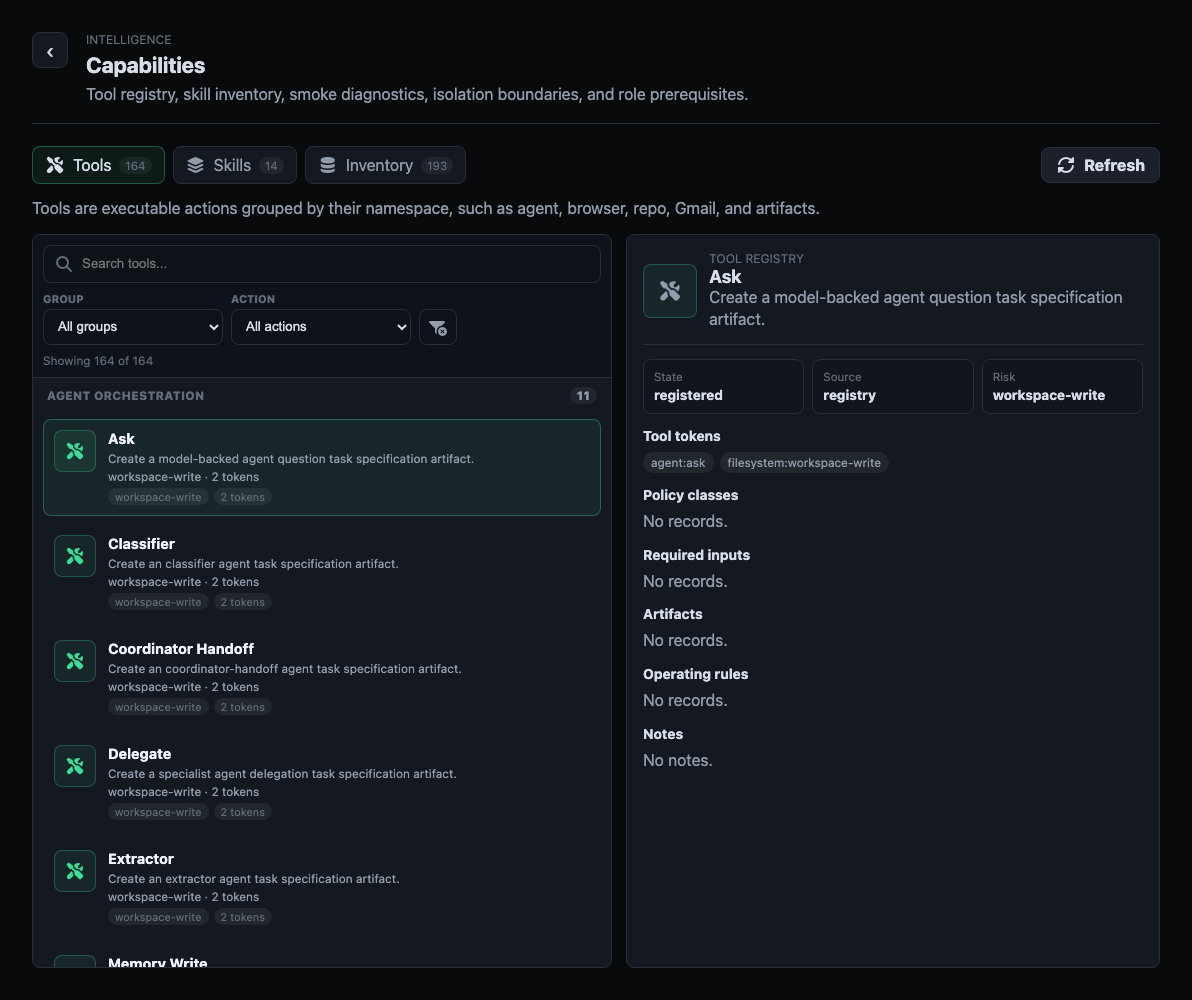
Use this section to:
- Switch between Tools, Skills, and Inventory.
- Search and filter available records.
- Inspect a tool or skill description, source, state, and risk.
- Check role prerequisites and unavailable tools.
- Create a new skill.
- Fill in skill ID, prompt profile, description, risk, operating rules, artifacts, examples, required inputs, and failure modes.
- Validate a skill before importing it.
- Import a skill manifest from JSON when you already have one.
- Attach the skill to an agent profile or workflow node.
Treat capabilities as permissioned building blocks. A skill should describe when it applies, what it may do, what it should produce, and what risk boundary it carries.
Related guide: Create and use skills.
QA Standards
QA Standards define the verification and review preferences agents should use when they plan, implement, or check work.
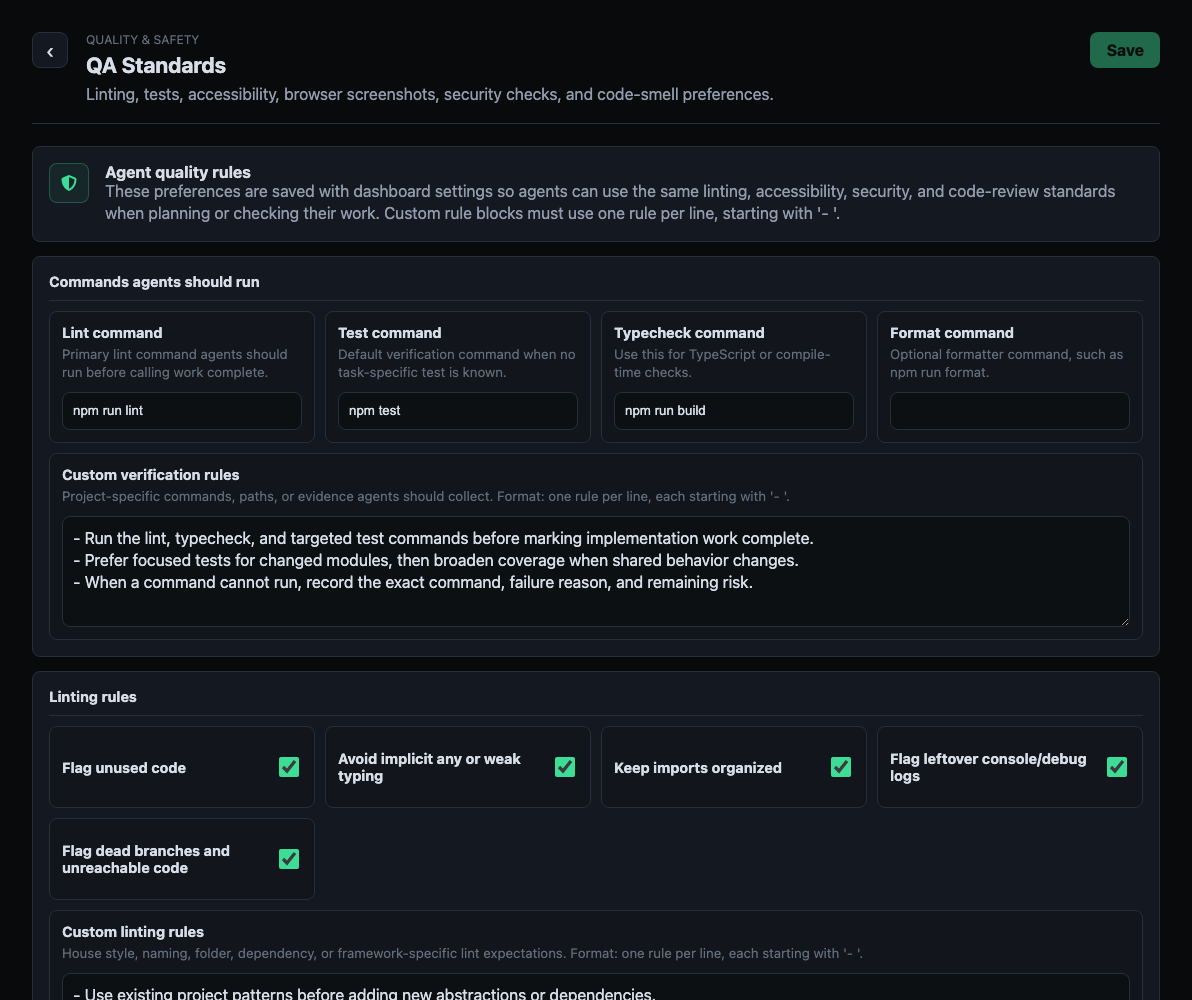
Use this section to:
- Set lint, test, typecheck, and format commands.
- Write custom verification rules.
- Enable linting expectations such as unused-code checks, import organization, weak typing checks, and debug-log cleanup.
- Set accessibility expectations for keyboard navigation, focus states, color contrast, labels, semantic HTML, and reduced motion.
- Set security checks for secrets, validation, injection risks, auth boundaries, dependency risk, file access, and external requests.
- Set code-smell checks for duplication, large functions, branching complexity, coupling, naming, weak errors, and missing tests.
- Add custom rule blocks using one rule per line, starting with
-.
These settings do not replace project-specific tests. They give agents a shared checklist so they know which evidence to collect before reporting that work is complete.
Related guide: Prepare a project for Aegis.
Approvals
Approvals define when work must stop for human review and what evidence the reviewer should see.
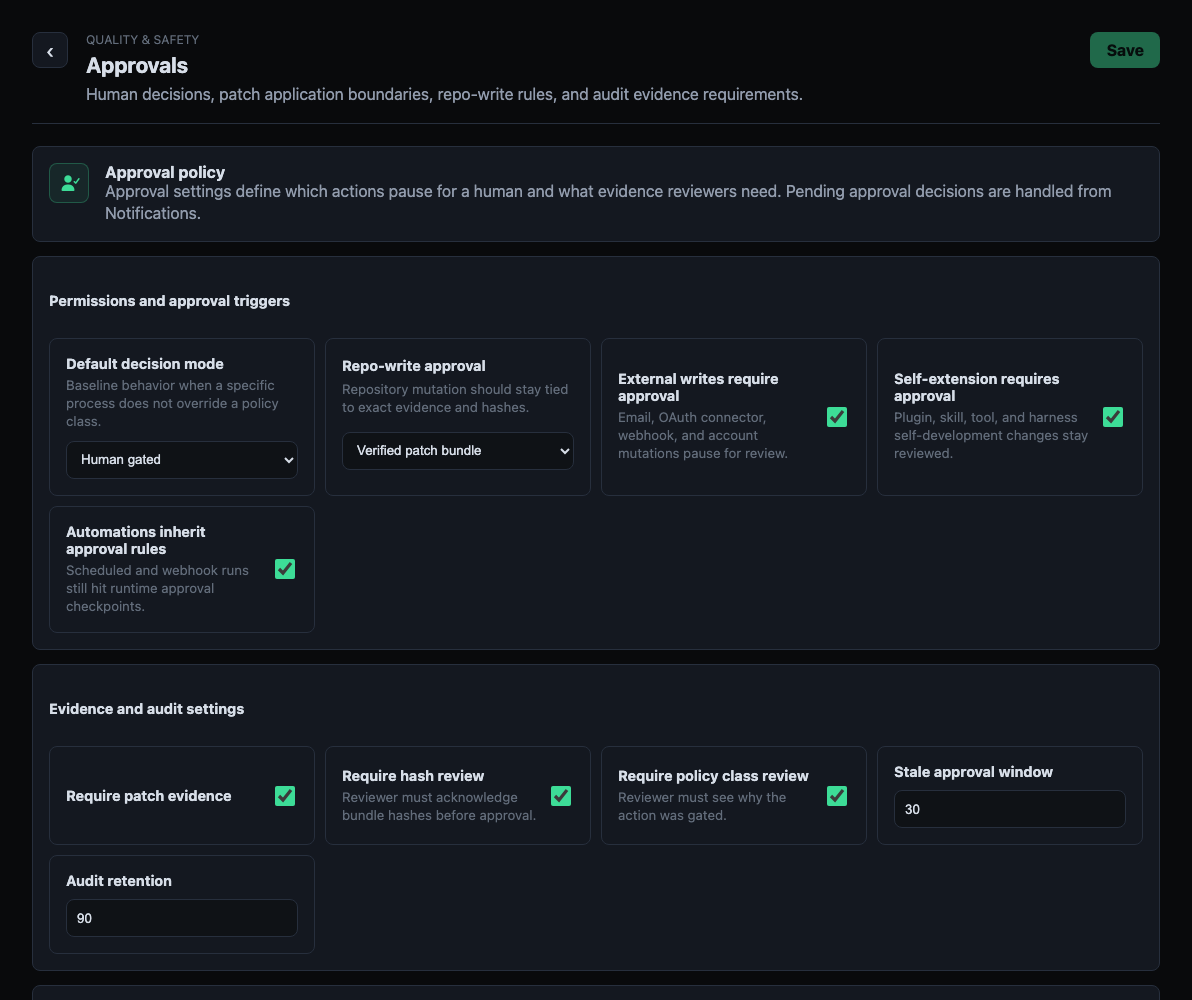
Use this section to:
- Choose the default decision mode.
- Set repo-write approval behavior.
- Keep external writes approval-gated.
- Keep self-extension approval-gated.
- Decide whether automations inherit approval rules.
- Require patch evidence.
- Require hash review.
- Require policy class review.
- Set the stale approval window.
- Set approval audit retention.
Repository writes should stay bound to exact patch bundles, file hashes, and verifier output. Connector writes, external delivery, and self-extension should also remain approval-gated unless the workflow has a deliberate, lower-risk policy.
Related guide: Approve a change.
Secrets
Secrets manages local credential metadata and secret material. Raw values are write-only; the UI and API show metadata, hashes, status, and redacted previews instead of secret values.
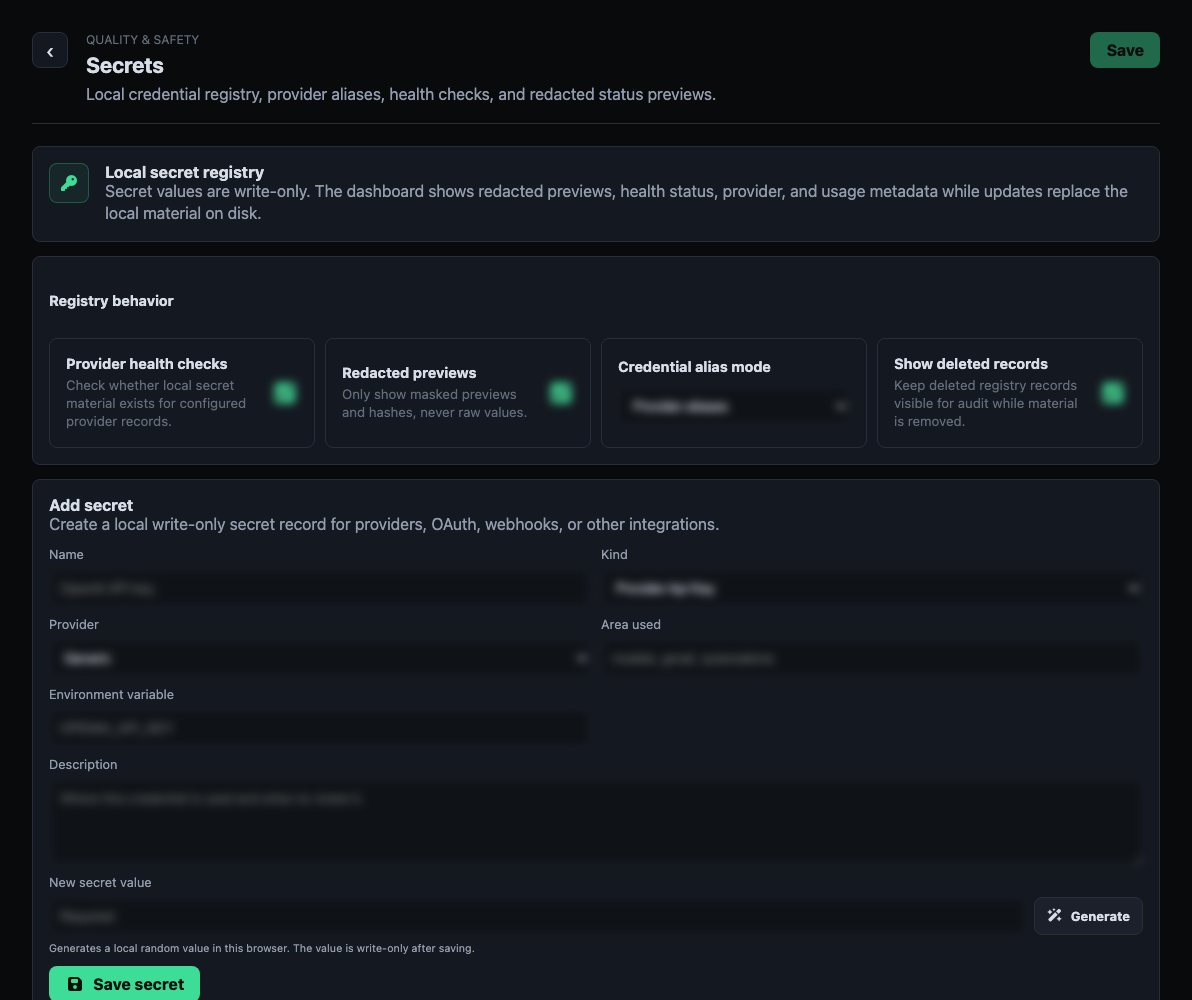
Use this section to:
- Add a provider API key, OAuth client secret, webhook secret, or other credential.
- Give each secret a clear name.
- Set kind, provider, and area used.
- Check whether local secret material is present.
- Run health checks for all secrets.
- Filter by kind or provider.
- Delete secret material while preserving registry history for audit.
- Choose whether deleted records remain visible.
Use Secrets before configuring providers or connectors that need credentials.
Related guides: Add model providers, Set up accounts and connectors.
Connectors
Connectors configure application-level OAuth apps and connected accounts for external tools. Workflows use those accounts through connector tool nodes or agent tool allowlists.
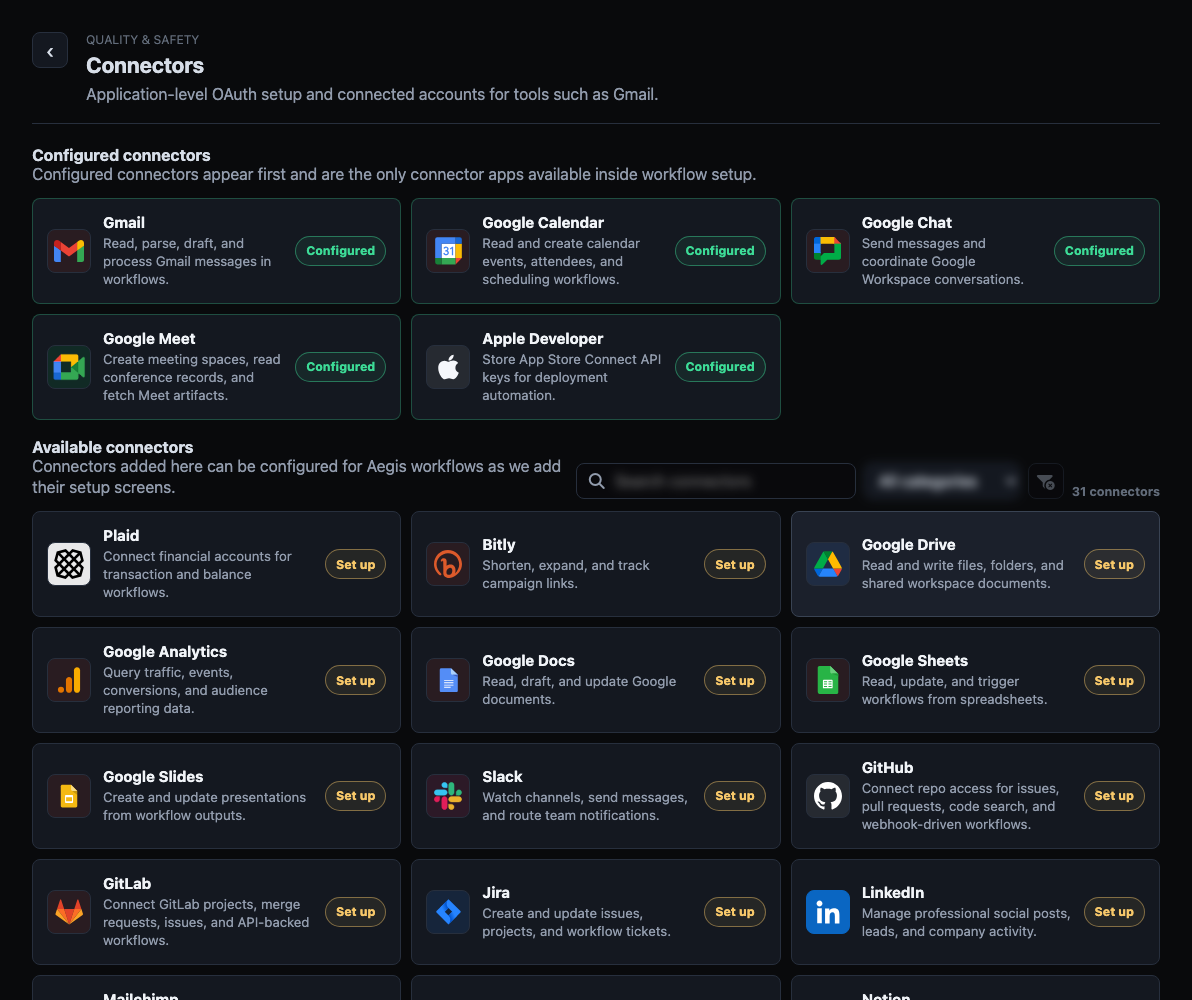
Use this section to:
- Choose a connector from the catalog.
- Configure the app-level OAuth client ID, client secret, redirect URI, and scopes.
- Save the app configuration.
- Start account authorization.
- Complete the provider authorization flow.
- Confirm the account is connected.
- Check connector status and scopes.
- Use the connected account in workflow nodes or dashboard components.
Start with read-only scopes when possible. Add write scopes only when a workflow needs them and the approval policy is clear.
Related guide: Set up accounts and connectors.
Audio
Audio controls transcription, live audio chat, speech output, and provider defaults for audio sessions.
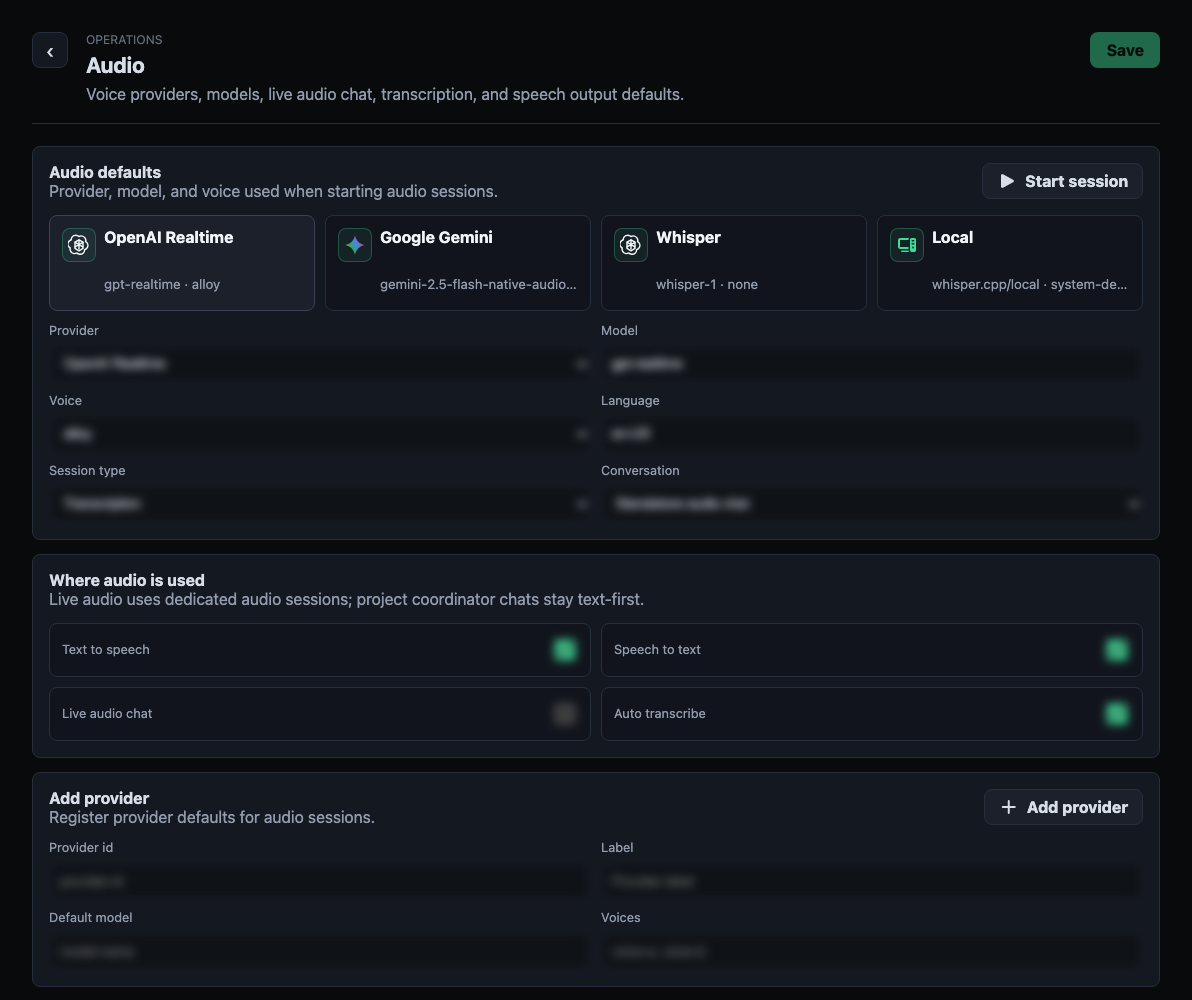
Use this section to:
- Choose an audio provider.
- Select the model and voice.
- Set dictation language.
- Choose transcription or live audio chat mode.
- Link audio to a conversation or use standalone audio chat.
- Enable or disable text to speech, speech to text, live audio chat, and auto-transcription.
- Register a custom audio provider.
- Start, end, and refresh audio sessions.
- Review recent audio session status.
Built-in audio provider choices include OpenAI Realtime, Google Gemini, Whisper, and local audio options. Provider keys still belong in Secrets.
Suggested Setup Order
For a new install:
- Finish Installation.
- Add secrets needed by providers and connectors.
- Configure Models.
- Configure Agents.
- Configure Connectors.
- Configure Planner if you use Gmail, Calendar, or Slack planning.
- Review QA Standards.
- Review Approvals.
- Configure Memory.
- Configure Audio only if you plan to use transcription or live audio.
- Build and test a small workflow.